
Well, I finally started... good grief it took me forever and now I'm already behind! Only about 5 weeks into the year... figures...
BUT... I'm really happy with my first 2 weeks. I get really caught up in making my layouts look perfect, but why? I'm doing this so we can remember what we did this year. I'm not doing this to impress everyone... so as long as I love them, what's it matter? Right? Anyone else deal with this? :)
Here's my first two weeks... and I have to say it would have taken me WAY longer to get them done if it weren't for the Photo Focus Pockets Templates by LJS Digital Designs. They are just awesome and there are tons to choose from. They are easy to use and they even have the shadows done for you!
Let me show you...


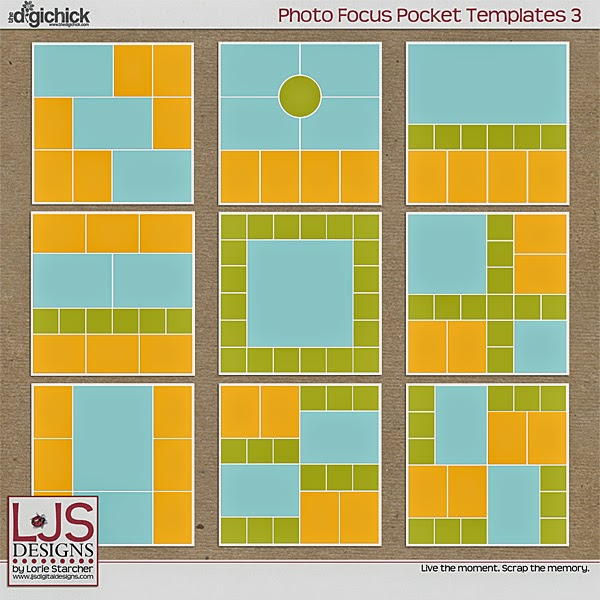
Aren't they awesome? So easy and tons of choices. Can't beat it!


For those of you who are just starting out with Project Life or Photoshop in general, I want to share with you a very simple little thing that has saved me tons of time since I learned about it... Incidentally, it took me awhile to try it... why do we do that? It's not complicated and seriously... it's a life saver!
It's a little thing called CREATING A CLIPPING MASK... Basically, it's a fancy way to say you are 'clipping' your paper to a shape or text... The paper version example: Say you have a chipboard heart. You cut out a piece of patterned paper/cardstock or photo to glue onto the heart. Easy right? Well, the digi version is MUCH easier! Here we go... (my screenshots are made in Adobe Photoshop CC, but they can be adapted easily to Photoshop Elements)
Step 1: Open a template, shape, or text. (I've used one of the templates shown above)

Step 2: Drag your paper to the layer above whatever you want to 'cover'.

Step 3: Select the paper or photo and right click. Select Create Clipping Mask from the drop down menu. You can also hold down ALT and place your mouse arrow on the line separating your layers in your layer palette. You will then see a little down arrow and white box, simply click your LEFT mouse and it's clipped!

This is what it will look like... Now at this point, you can move or re-size your paper or photo to make it look exactly as you want it.

Step 4: Click on both layers, RT click, and choose Merge Layers. Now you can add a shadow or whatever else you want to do!

Here's a couple tips... make sure your layer that you are clipping to doesn't have a shadow on it when you clip it... and you just have to play around with it. It took me a little bit to get the hang of it, but I use it on almost every single thing I create now!
Please let me know if this spurs any questions... if I don't know the answer, I certainly know some amazing Photoshop gals who can help me answer you!
Happy scrapping!

1 comment:
Hi there, I'm Lindsey! I have a question and would love to speak with you. Could you please email me at your convenience? Thanks so much, I look forward to hearing from you! lindseyDOTcaldwellATrecallcenterDOTcom
Post a Comment